|
|
||
|
|
Creative Woodworking - Arts and Crafts Kitchen Story |
|
|
|
||
For the Arts and Crafts kitchen what I am going to do is to show the entire process of a kitchen renovation from start to finish. I chose this kitchen to feature mainly because it is a renovation in a 1920's bungalow, which is my favorite type of house, and because the owner is very sensitive to getting the house back to the true Arts and Crafts style it was created in. As with most of these old houses, previous owners had made modifications that were not in keeping with the original style.
Background:
This kitchen project is one that has a little bit of everything. Along with the usual design of the new kitchen cabinets there will be a doorway moved, an opening for a bar/pass-through, new flooring, and the usual demolition that goes along with this type of work
This kitchen presented a couple of unique problems right from the start. First of all, the kitchen is built on a concrete slab that is on the back side of a 1920 Arts and Crafts bungalow. The house sits on a slope so this kitchen also has an apartment underneath it. So immediately plumbing became an issue. The kitchen also has three doorways, multiple windows, an existing breakfast nook, and an old plaster covered fireplace stack in the room that, for the sake of expense, will not be removed.
The idea for the new kitchen is to create a very usable space that also fits in with the original style of the house and neighborhood. The desired choice for the cabinet style is true Arts and Crafts using quarter-sawn oak with a Mission finish.
So, the process is this:
This particular kitchen is out of town for me (about 60 miles away) so I will be building the cabinets before doing any demolition. That way when the demolition is done I can install the new cabinets right away and minimize the amount of time the customer is without a kitchen. So scroll on down or click the links above to view the progress!
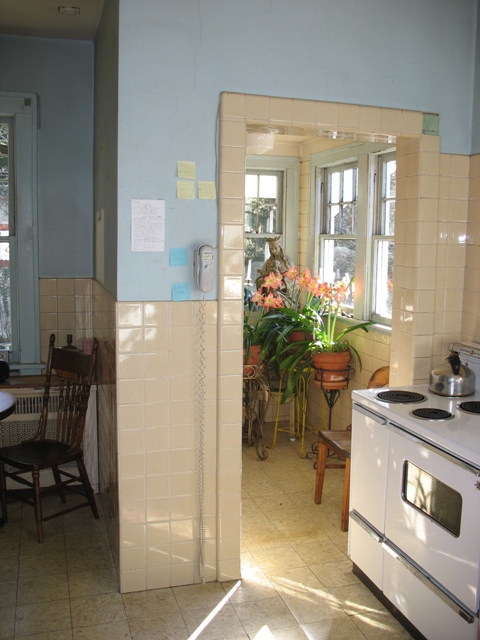
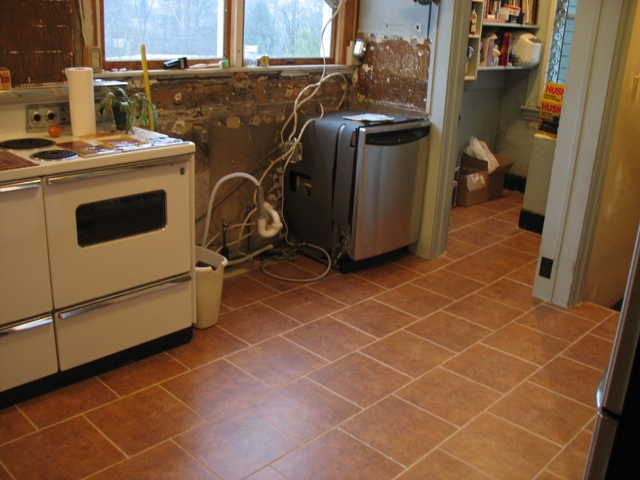
The existing kitchen: Here's what we are starting with:
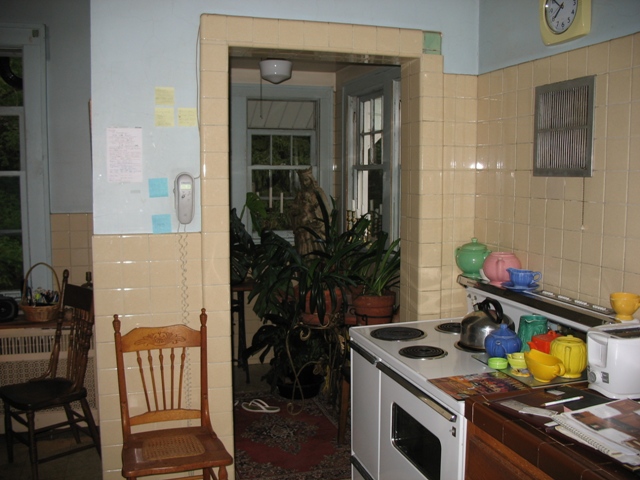
This is a view of the kitchen as you come in from the dining room. To the right of the window in the above picture are two doors. The picture on the left shows an area that was a porch at one time and the edge of the breakfast nook. And it shows that the previous owners had a slight obsession with wall tile.
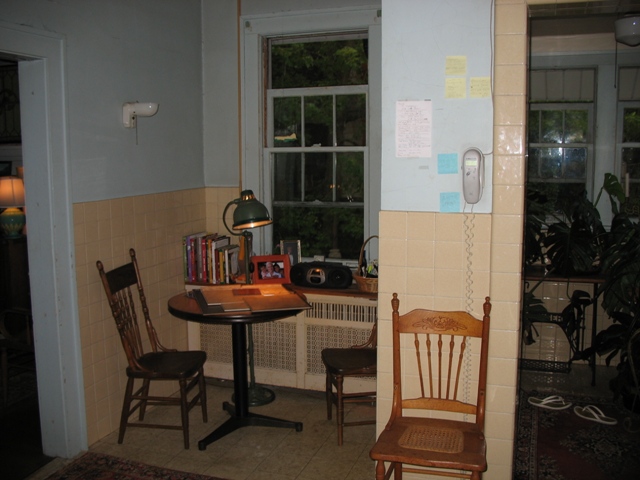
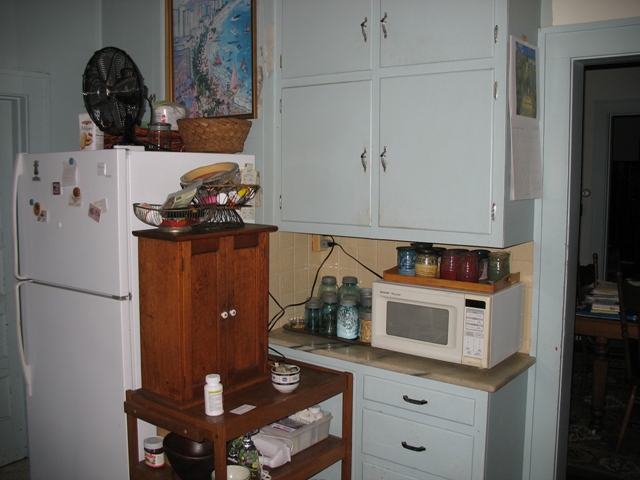
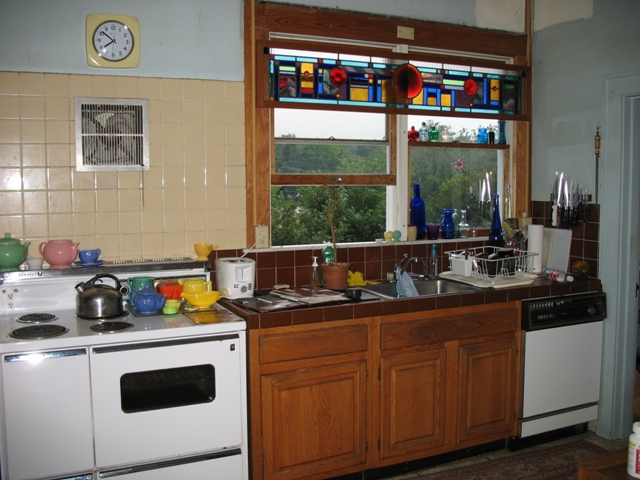
The above pictures show the breakfast nook with the entrance to the dining room, and the wall opposite the sink. The brick fireplace stack is not very noticeable in the picture but it is behind the refrigerator. This caused the refrigerator to be pushed out into the middle of the room.
The New Design:
The first step of a new kitchen is always the design. In this case the customer had some very specific ideas so we started with those and worked out the rest. The layout of the room did present some challenges. One of the biggest challenges was to stay within the budget and still get a workable layout. Had money not been an object, we probably would have come up with something different. But removing walls, and moving windows adds cost so we tried to minimize those type of changes.
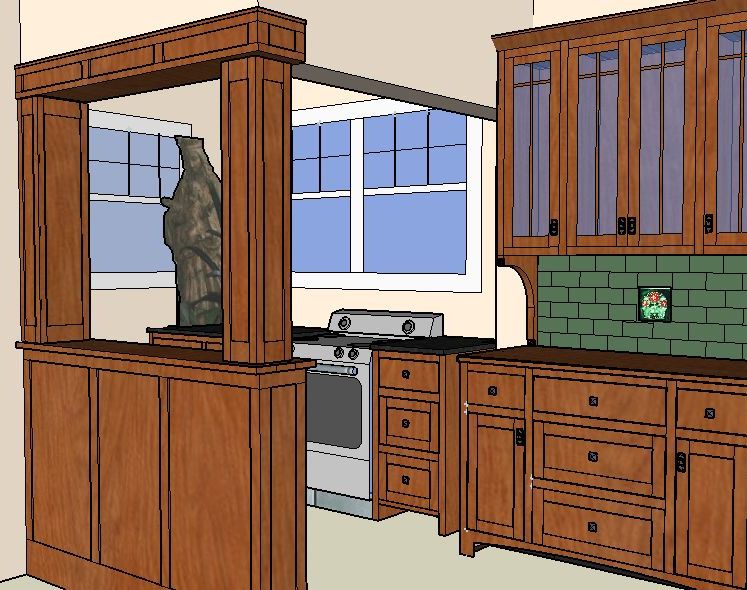
When doing designs for customers I like to use drawing software that will give the customer an actual 3 dimensional scaled view of the new kitchen. So here are some sketches of what the new kitchen will look like.
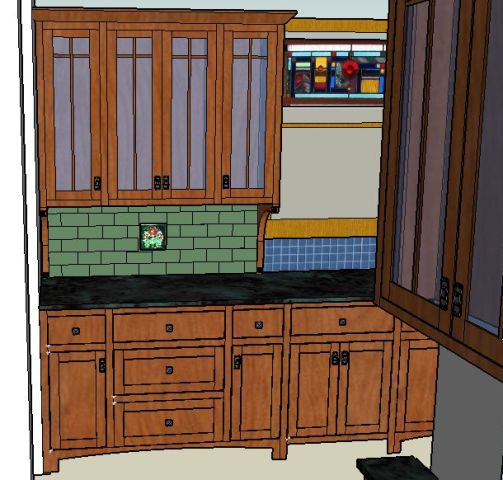
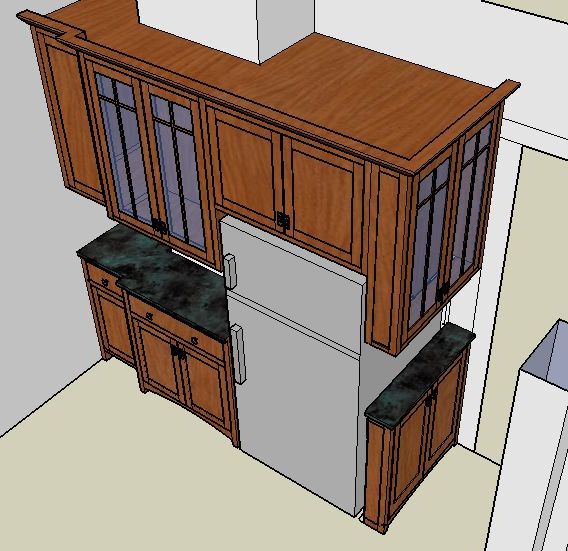
This first sketch is the view from the dining room door. With the current kitchen this view looks right at the oven with no wall cabinet at all as you can see in the photos above. One of the customers request was to get the oven out of sight. So, once the oven was moved, we decided to design the cabinet that is most visible from the dining room to have the look of a separate "hutch" piece even though it is part of the continuous base cabinet:
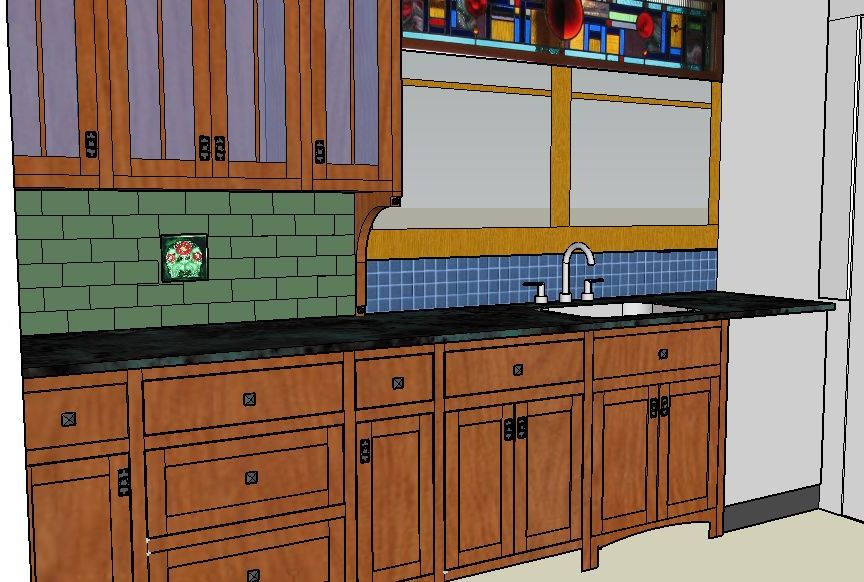
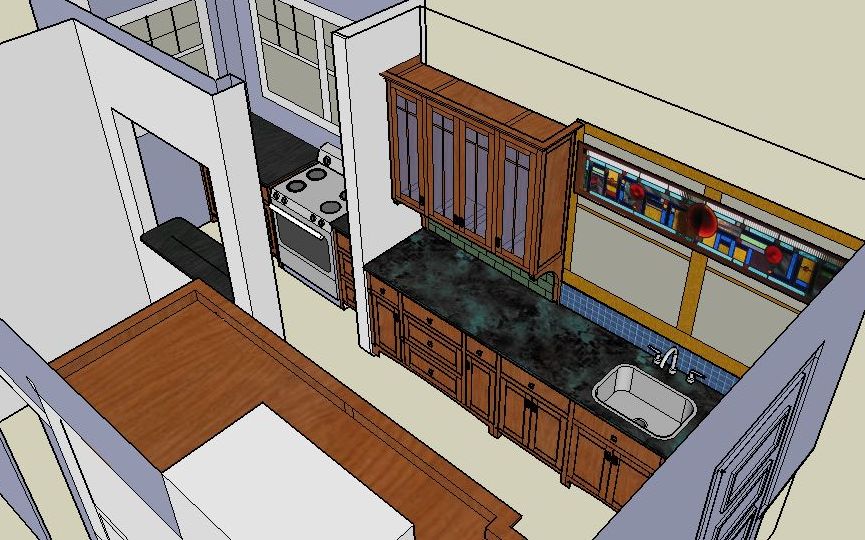
Here is another view from a little further in the kitchen showing the sink placement. The dishwasher is at the end of the cabinets. The base cabinet under the "hutch" piece has an arch on the toekick as does the area under the sink. The sink and dishwasher were kept where they were to minimize plumbing changes, the only difference being the sink will now be lined up with the center of the windows. And the tile colors are really just me playing around. The finished tile won't look like that:
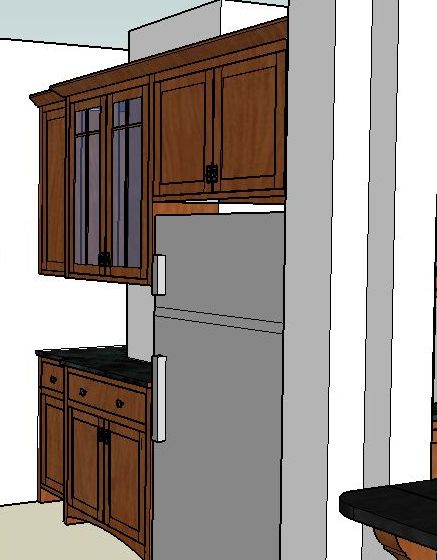
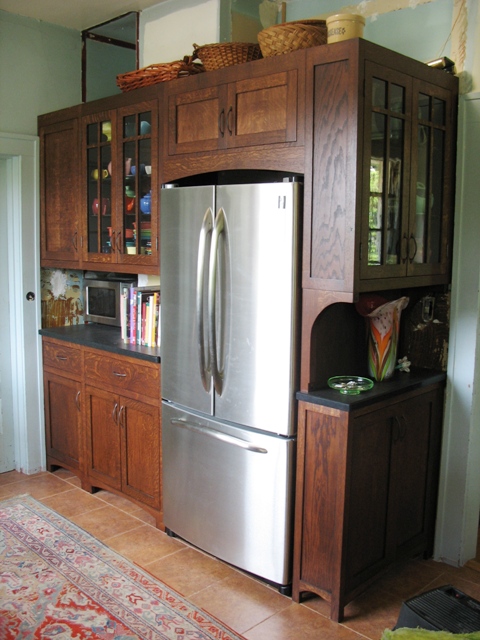
The refrigerator was moved to be beside the existing brick fireplace stack so it will open up the room. The end cabinet in the sketch is recessed to allow space for a doorway there that leads to the basement:
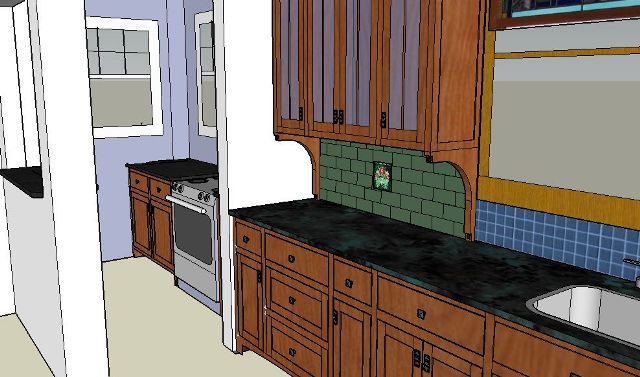
So you probably noticed we moved the stove. It is now in the area that was a separate room. We are going to open up the doorway that has all the tile around it in the above photos and move the stove in there with cabinets on both sides. This does stretch the classic kitchen "work triangle", but not to an extent that is unworkable. The new pass through between the breakfast nook and stove area is visible in this sketch also:
Here are two aerial views of the kitchen. Notice that between the newly repositioned refrigerator and the doorway we had about eight inches of space so we are putting an upper display cabinet with glass doors and a base cabinet below so the customer will have a place to put here keys, etc when she enters the room from the dining room. This also nicely frames out the refirgerator:
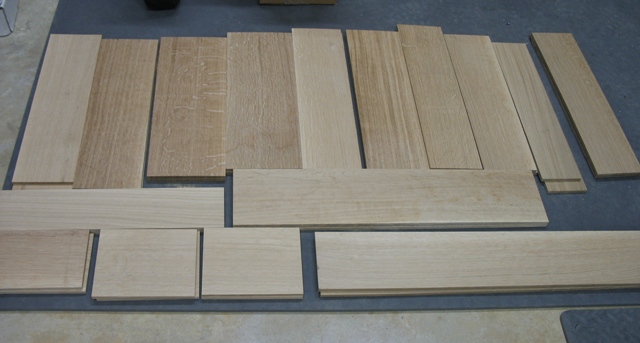
Once the design was finalized, the next step to find the material. Quarter-sawn oak is not always that easy to locate. There are lots of places to order quarter-sawn oak off the internet, but I am one of those that still likes to hand pick all the boards for a job. Luckily my local supplier (Greenville-Spartanburg Hardwood) had a good shipment in so I was able to select what I needed. The first problem I had, after the wood selection, was determining how to make the panels for the doors. The design of the doors is a classic recessed flat panel Arts and Crafts style. In most all cases on doors like this, the panels themselves would be made of a cabinet grade 1/4" plywood surrounded by solid quarter-sawn oak rails and stiles. In this kitchen I chose instead to make the panels out of solid 1/4" quarter-sawn oak, not plywood. This allows me to carefully select the boards to be used for each panel to bookmatch the grain for the best possible look. In case you aren't familiar with the term bookmatch, that is taking a board that is say, 7" wide, standing it on edge, slicing it down the middle (a process referred to as resawing), opening it up like a book to create a mirrored look in the grain pattern, and gluing the edges together to make a 14" panel. The process is much more tedious and time consuming, but the results are well worth the effort. So with the wood selected, here are pictures of the process of creating 20 panels of 1/4" thick quarter-sawn oak:
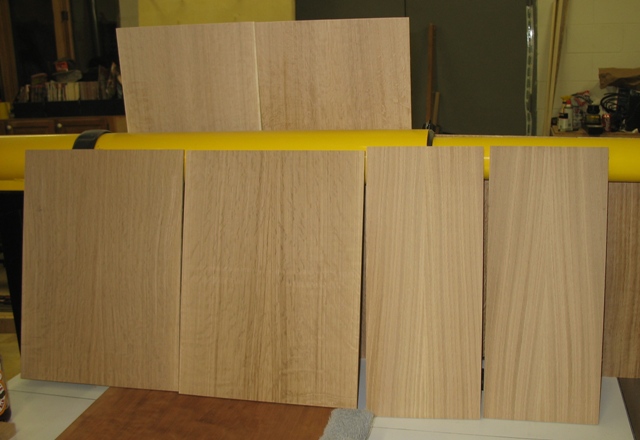
These are the panel pieces. In this photo they have already been sliced (resawed) and are paired on the floor:
I do recruit help from time to time and for this job I had the assistance of my dad, and my good friend Gary Knight, both excellent woodworkers, perfectionists, and a true pleasure to work with. Here a couple of pictures of Dad resawing the oak boards:
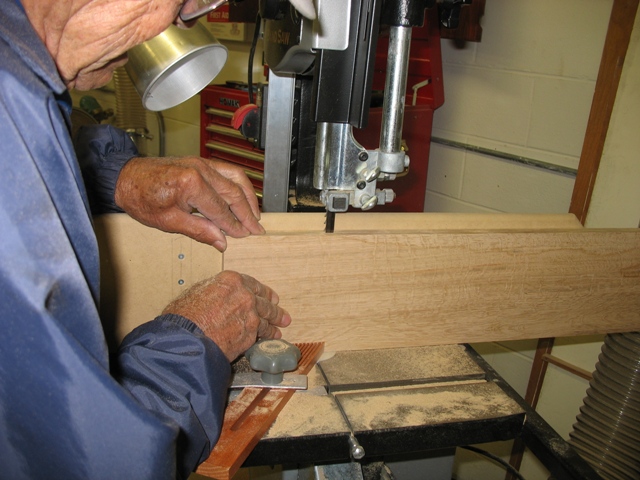
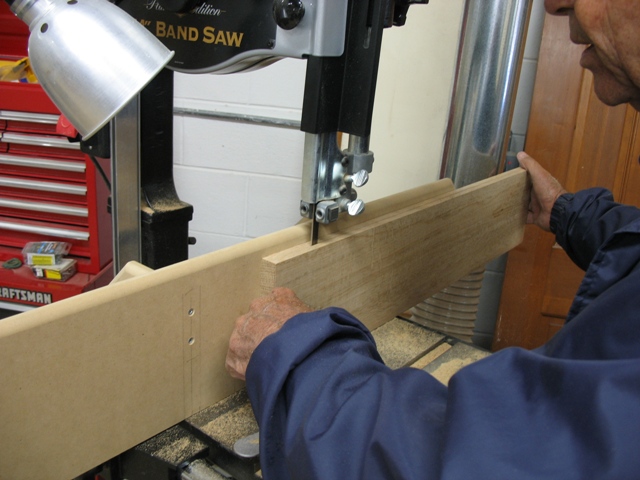
These photo show one of the boards after resawing. You can see how the board was sliced down the middle:
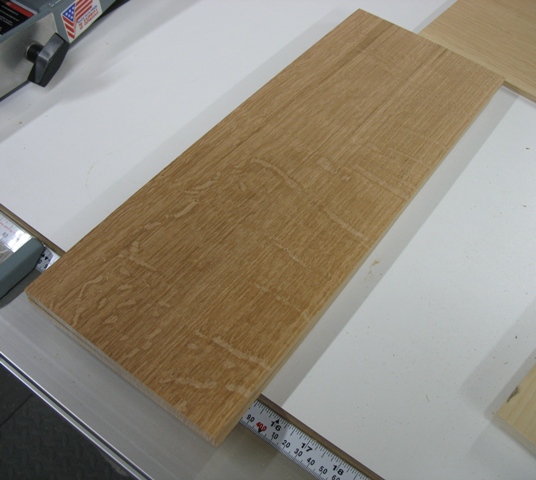
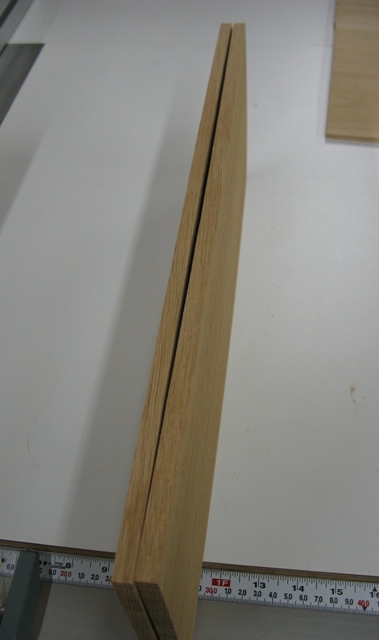
Then the board is opened up like a book:
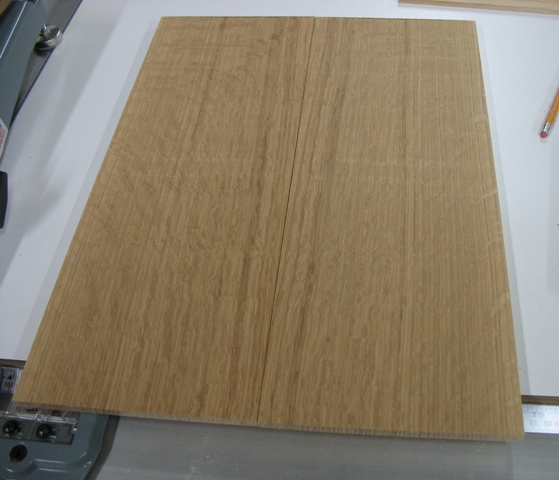
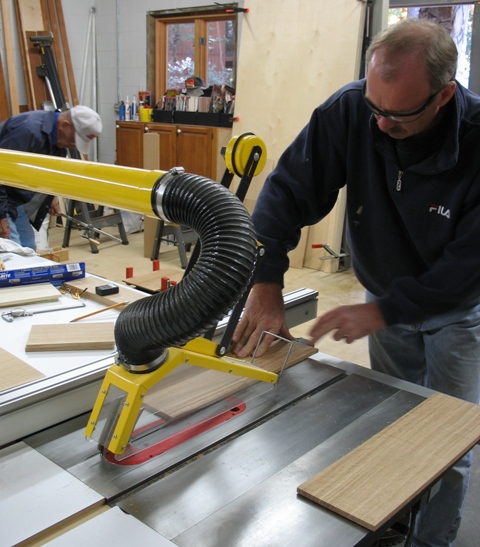
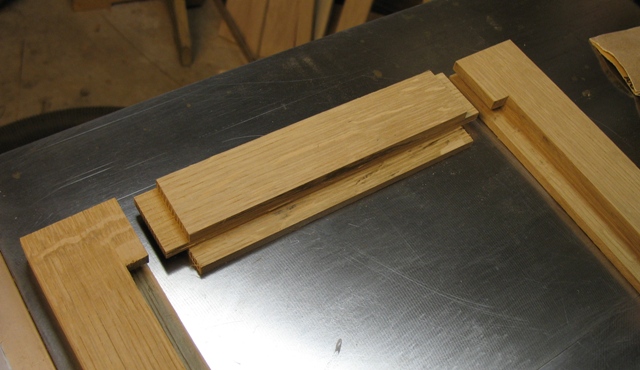
The next step is to make a good edge to glue the two bookmatched pieces together. Here is Gary cleaning up the edges on the table saw:
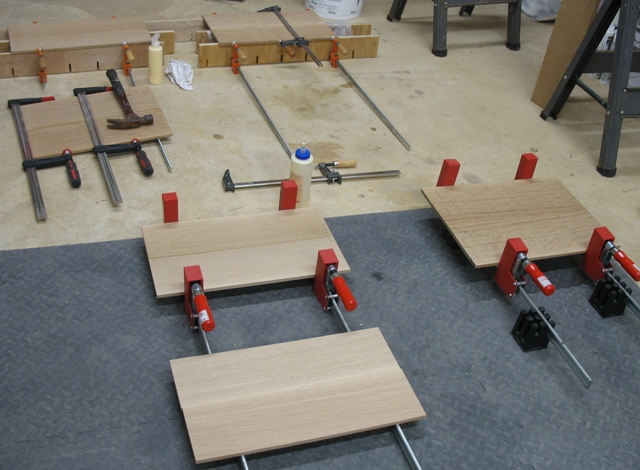
Then all the panels had to be glued up. We had clamps and panels everywhere:
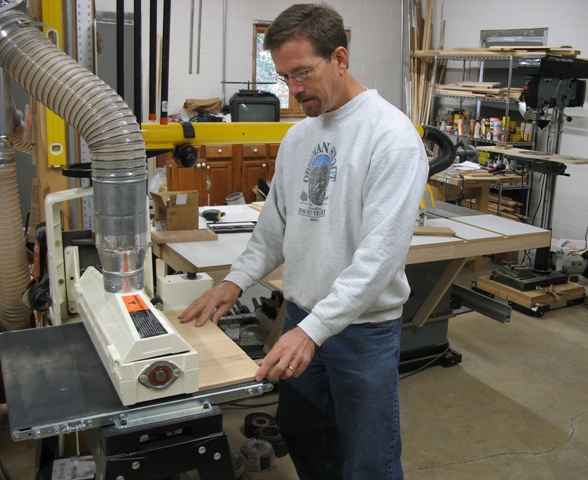
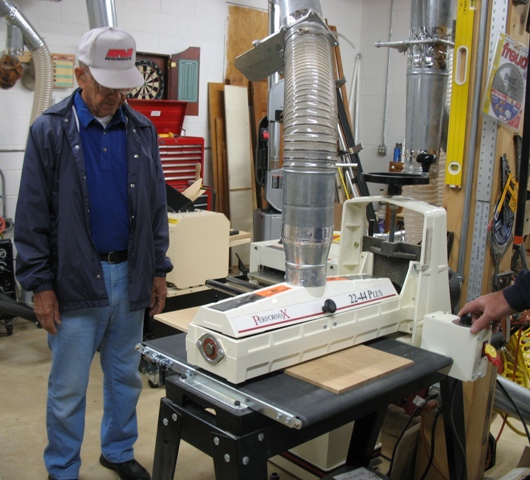
After the glue has dried, we are left with panels that are 3/8" thick, so they have to be sanded down to get us to the 1/4" thickness we need. Here Dad and I are feeding the drum sander:
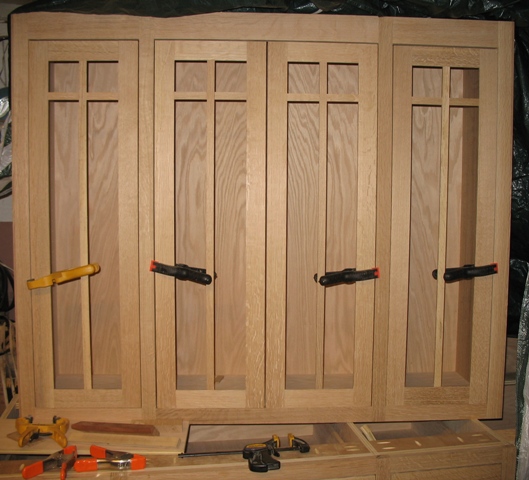
The end result of the resawing, edging, gluing, and sanding. This will be be four doors in the new cabinets:
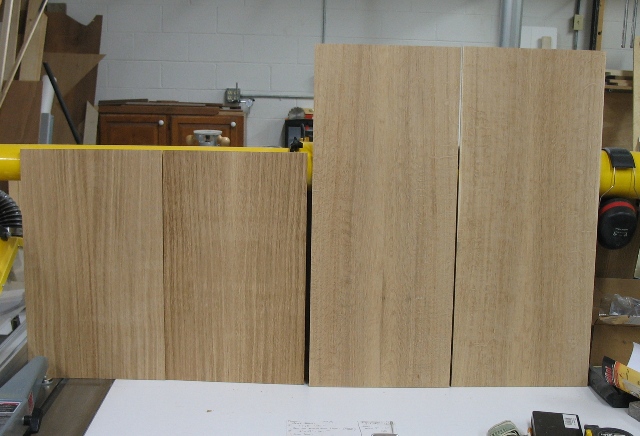
And here's a few more:
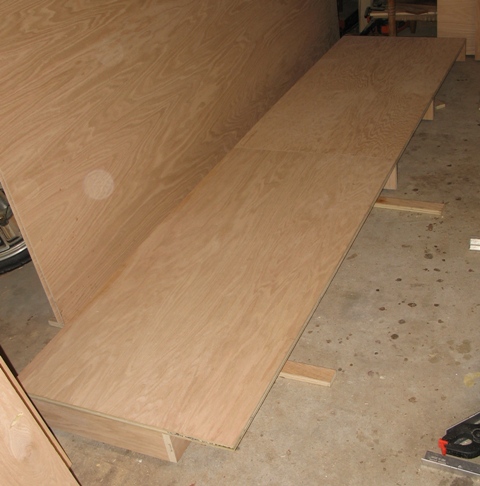
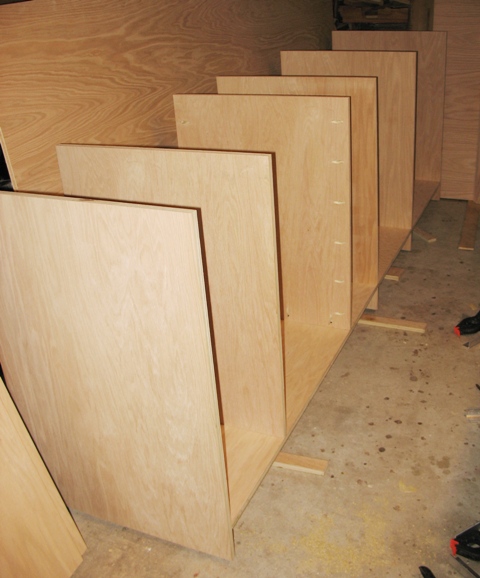
Before assembling the doors, I put the cabinets together in case I discover some design element that has to be modified. Here I have cut some of the panels to be use for the main base cabinet construction. White oak plywood is used to match the rest of the wood even though this will only be seen inside the base cabinets. Here are some of the cut panels:

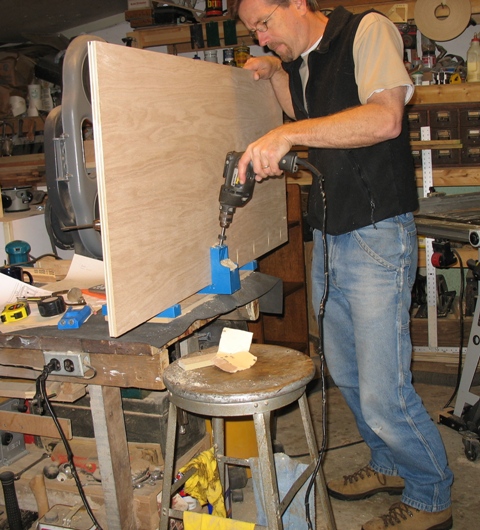
For assembly of the large partitions of the cabinet in areas that will not be visible, I use screws with pocket holes drilled for the special pocket hole screws. This makes extremely strong construction. Here I am drilling pocket holes. You can see my pride and joy, my 1930 Delta bandsaw peeking out behind the panel. For another view of it look in the "Woodcraft" section of this website:
In all of my kitchen projects I put a great emphasis on having a solid base for the cabinets. Here I am assembling the sub-structure of the cabinet (the toe kick area). This piece of the cabinet will be installed first and with great care to get it level and solid and the base cabinet will rest on this:
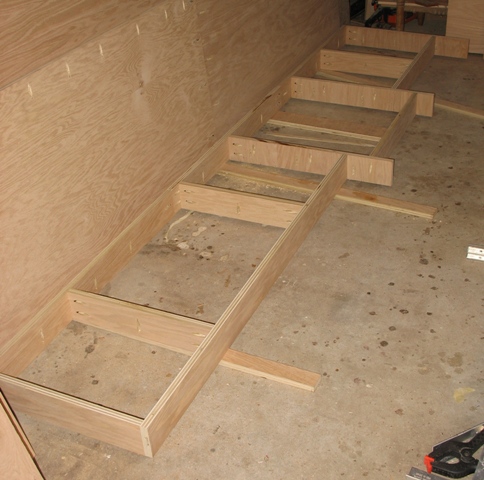
In the picture above you can see where the toe kick has different depths. This is because the area closest to us in the picture is where the arch under the hutch will be be. The arch will be all the way out to the front of the cabinets but we still need to have a toe kick recessed back so that anything that may be dropped and rolled under the cabinet will not go all the way back to the wall.
Here is the bottom of the main base cabinet going on. It will not be attached to the toe kick until final assembly on site:
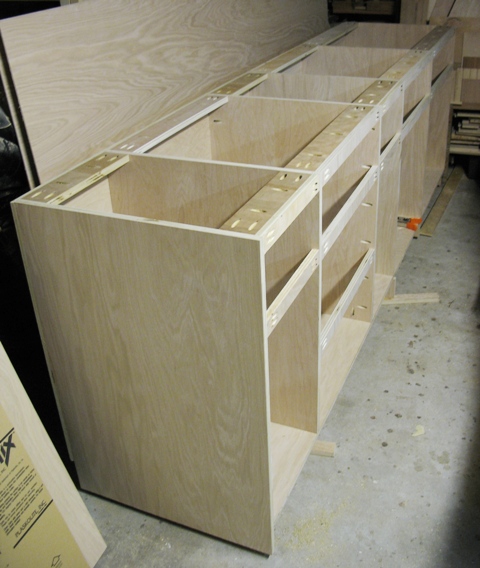
Now the partitions go on and they are attached to the bottom and the back:
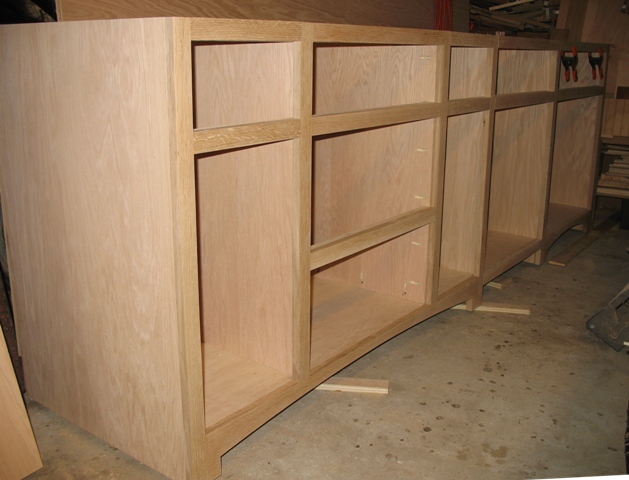
Now I put in additional bracing everywhere there will be face framing. Some people think this is overkill but I like really sold cabinets. Once the face frames, which are solid quarter-sawn oak, are attached none of this will be visible. It is simply for extra support. Now the cabinet is starting to show it's intended configuration:
The next step is the face framing for the cabinet.
Here's the assembled face framing for the hutch portion of the large base cabinet:
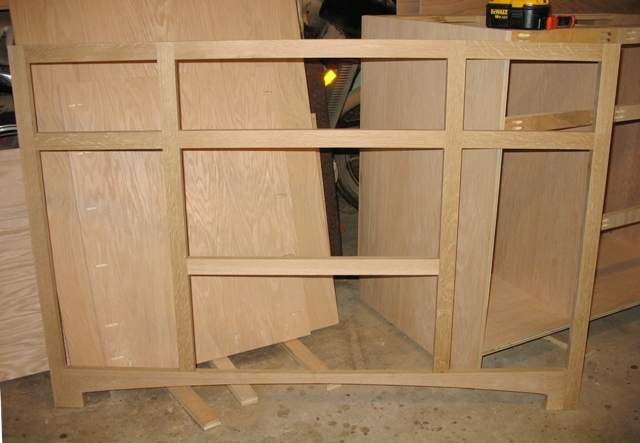
And here's the large base cabinet with all the face framing on for a test fit. It is finally starting to look a little more like a presentable cabinet:
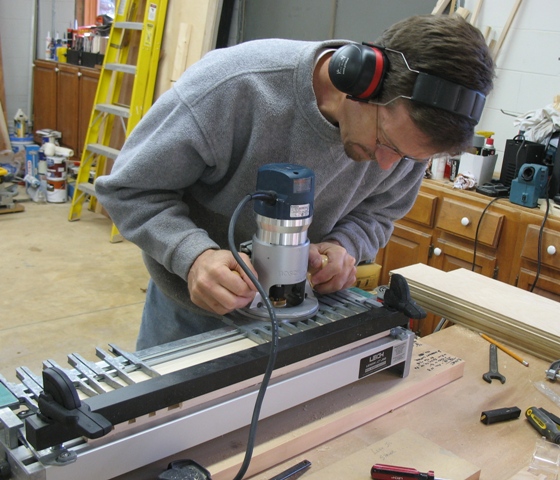
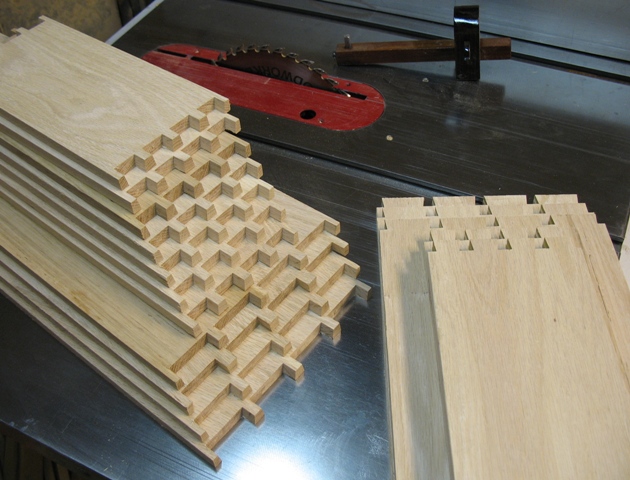
At this point I decided to go ahead and make all the drawers for the cabinets. It's a little hard to tell what is going on in this photo but I am making the dovetails for the drawer boxes...
Here are the drawer box pieces....
Here is the main base cabinet with the doors and drawer fronts test fitted....
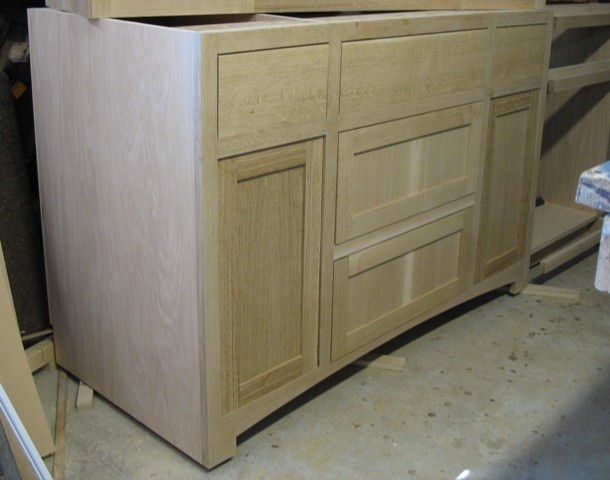
I've also started building the wall cabinet that will be above this base cabinet to give a hutch look....
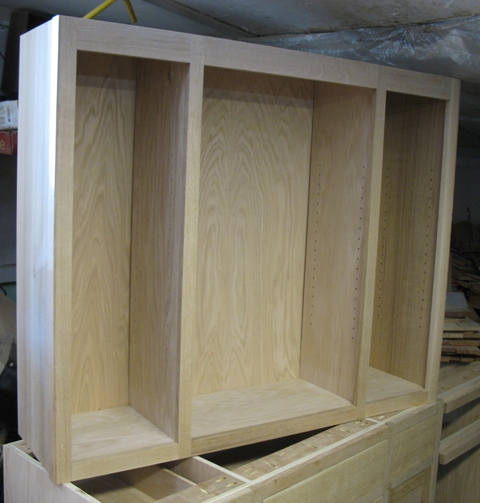
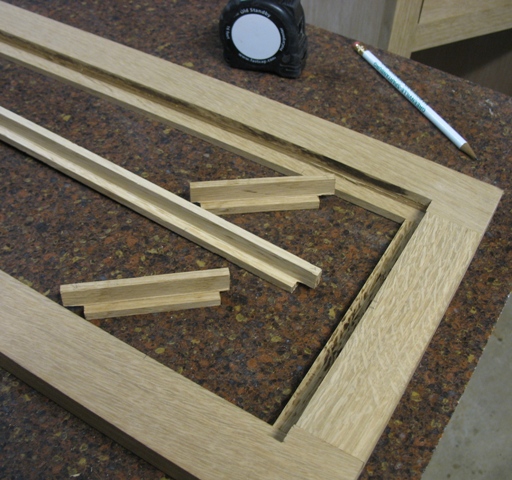
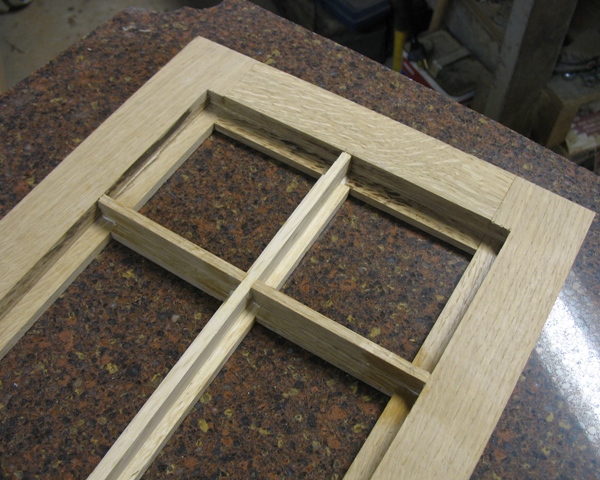
The next step is to make the doors for the wall cabinet. These doors will be glass paned. Here a few pictures of the doors going together...
Here I am test fitting the doors into the wall cabinet frame....
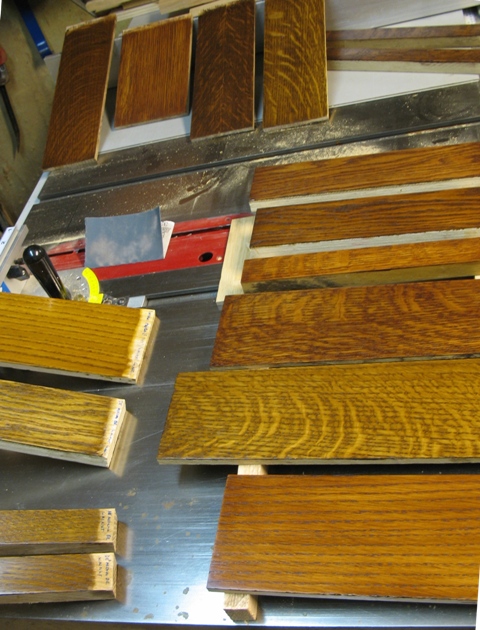
While the construction has been going on I've been making sample boards with different dye/glaze combinations for the customer to choose from. The idea is to get as close to what original Arts and Crafts cabinets would look like. Here are a few of the sample boards...
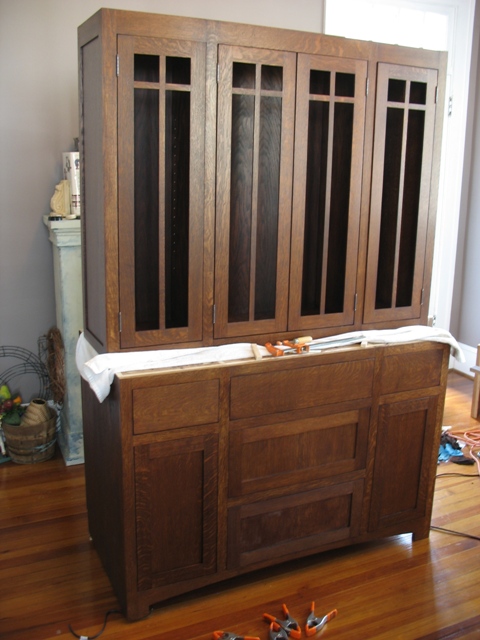
The final color choice was a darker finish that is a combination of aniline dyes and glazes to give the cabinets a little more of an aged look. Here is the hutch piece in the finishing room. The top cabinet will be on the wall when installed. The glass is not in the top doors yet, I had to find salvaged old wavy glass to put in them for the correct look...
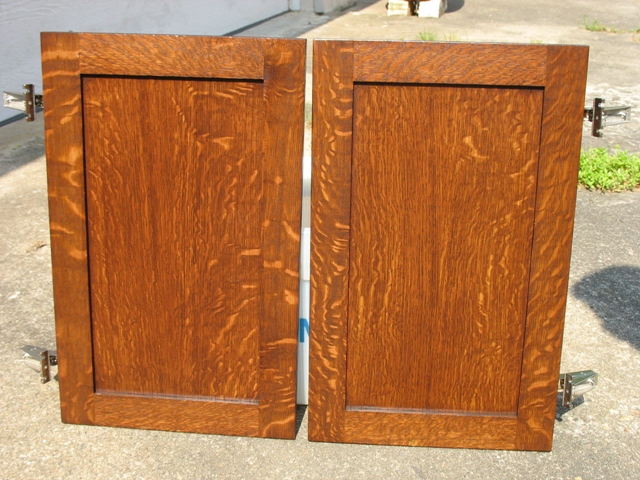
Here are a couple of the doors in the bright sunlight. The flakes of the quarter-sawn oak really stand out with this finish in light of day...
Old Kitchen Demolition and Modification
While the finish is drying on the constructed cabinets, demolition started. The first order of business was to remove the tons of tile from the walls of the kitchen and around the doorway that was to be expanded. Here's what the doorway looked like:
So I began taking the tiles off the door frame only to find more tile under that (notice the green tile), and under the green tile I found about an inch of plaster and mortar and then brick!
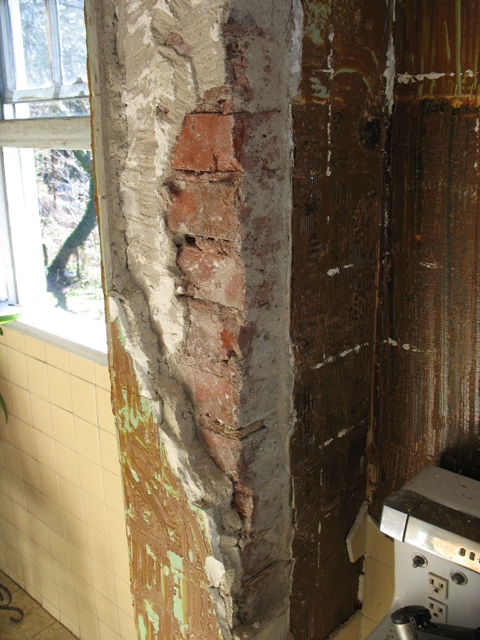
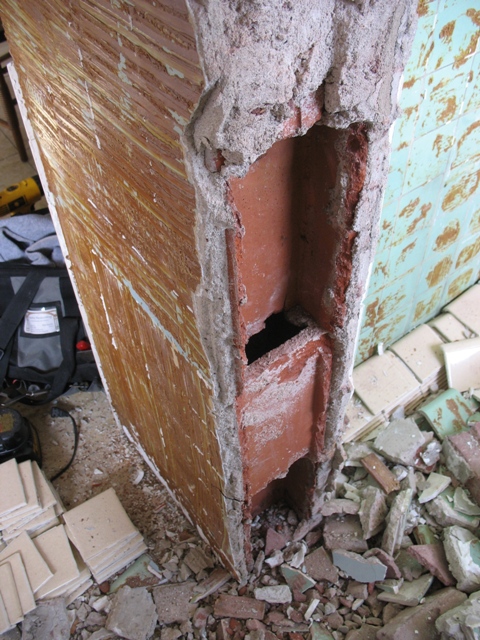
After digging the brick out I ran into the true construction of this house. It is made out of hollow clay tile, something I had never dealt with before and I imagine there are very few people who have. In the next picture you can see some of the tiles broken away. They are made of terra cotta material and stacked and mortared like concrete block and plastered over. If there is ever a nuclear attack I am going to go to this house to ride it out. I am sure it is bomb and radiation proof...
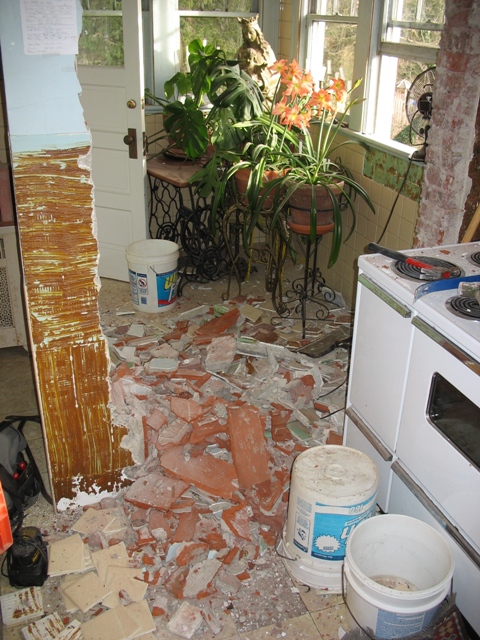
Here you can see where I have opened up the old doorway (and the mess it makes)....
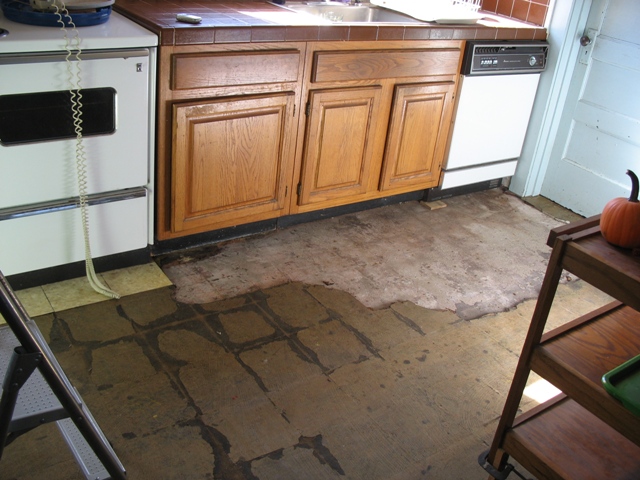
I decided to take a break from masonry demolition and get the old linoleum off the floor and came across another surprise. The linoleum was on top of 1/2 cork board that was nailed into the concrete slab underneath it. I could not understand why the cork board was there until I found that part of the floor had ceramic tile under the linoleum and the cork board was there to level it all out. Here are pictures of the floor removal...
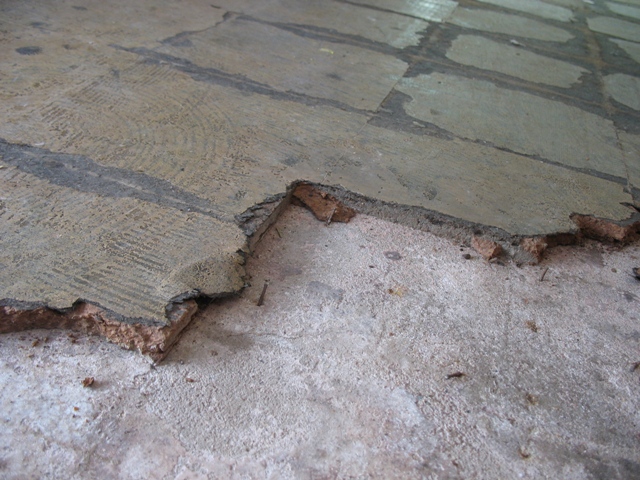
In the next picture you can see the old ceramic tile starting to appear...
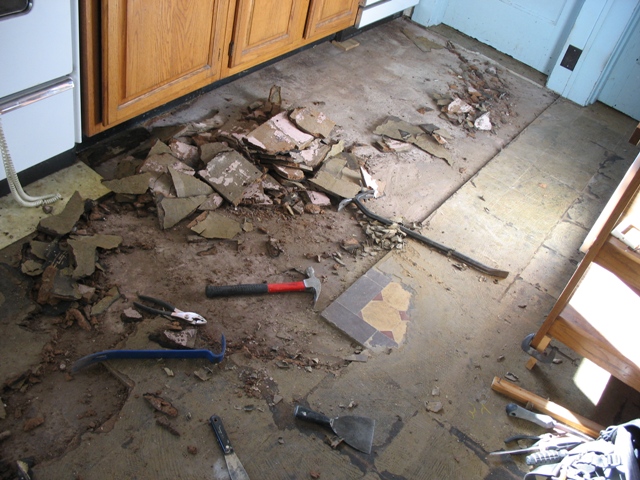
This is the glamorous part of cabinet making....
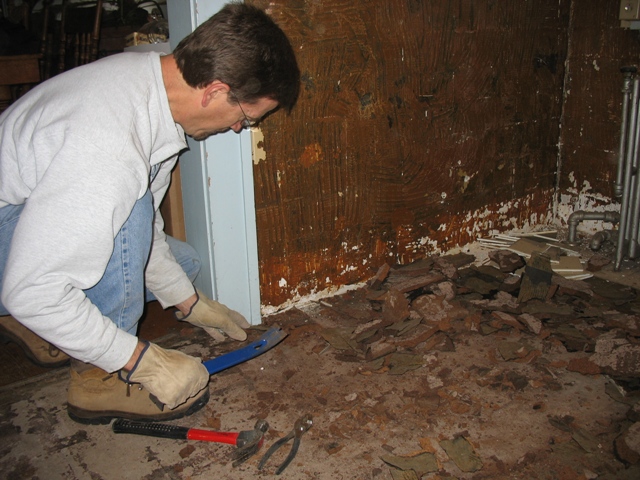
With the floor somewhat cleaned off I turned my attention back to the wall that needed a hole for a pass through. I started a small hole to see what I was dealing with (all the brown is where the old tile used to be)....

There was nothing to do but chisel away now...
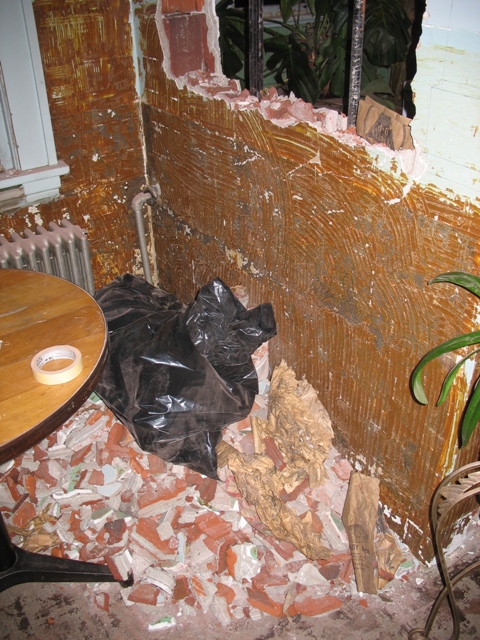
Here is what I thought was going to be the final hole in the wall for the pass through....
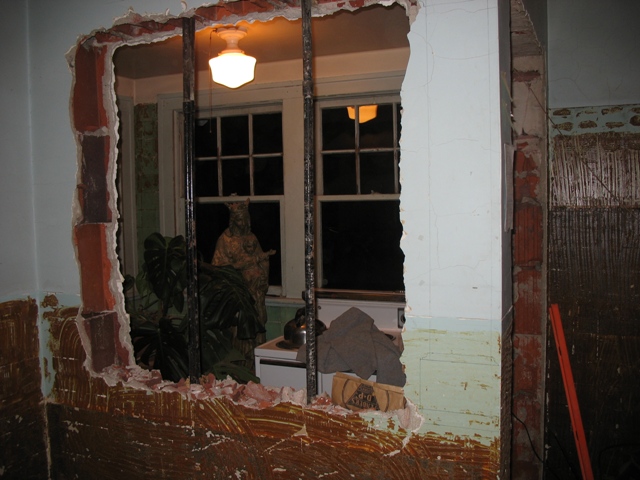
But.... after seeing how the opening really opened up the room, we decided to change the plan. Instead of a simple square opening the plan now is to open it on up and frame it out with quartersawn oak like the cabinets, and have a column supporting the load bearing wall. Here is what the new opening looks like in the daylight, and then a drawing of the new plan...
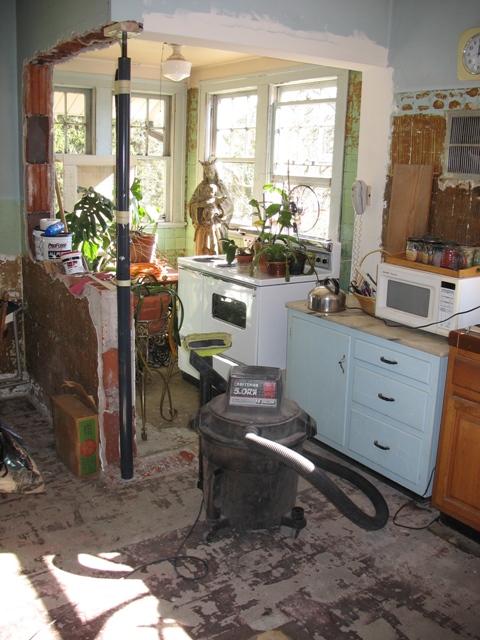
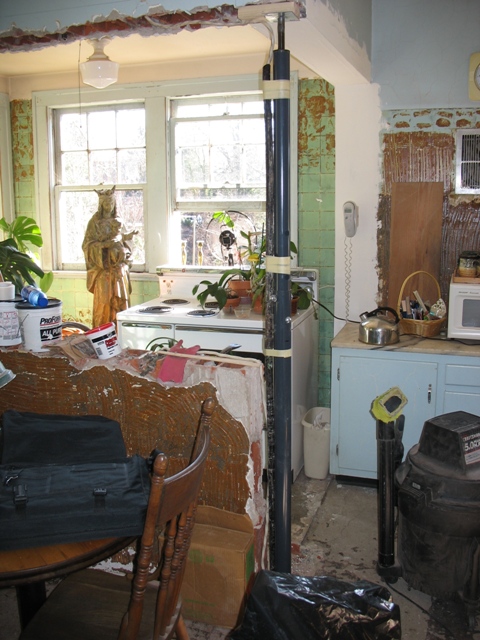
The new plan for the corner...
Now that the kitchen has been torn apart, the next step is to put down new flooring. Since the existing floor was a concrete slab we decided to go with ceramic tile instead of a wood floor. The new floor tile...
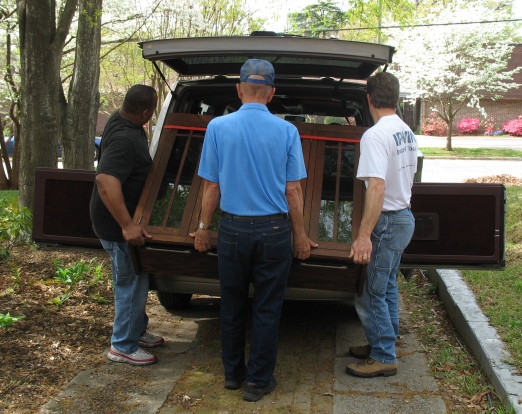
It is now time to bring in some cabinets.
With the help of my able assistants we load the cabinets for the trip to Asheville. Believe it or not that cabinet did fit in the van (barely)...
Some of the cabinets piled in the kitchen...
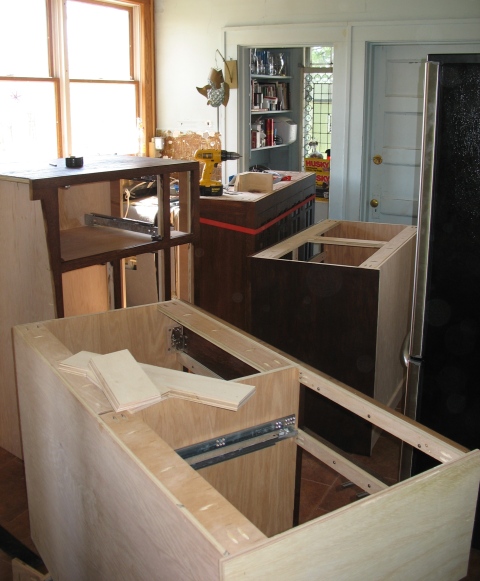
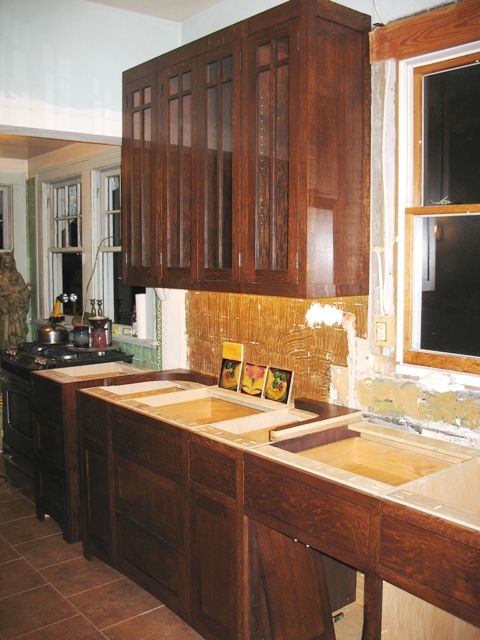
The first cabinets put in place....
The same section with countertop installed: The countertops were done by Viktor's Granite and Marble in Asheville and their work was excellent. The countertop is absolute black granite with a brushed finish....
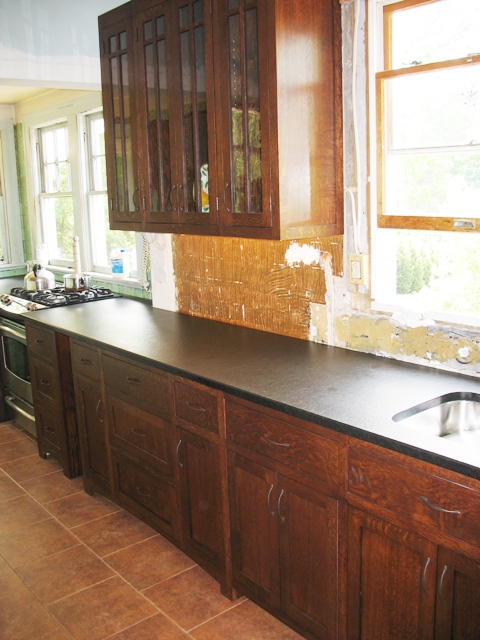
Another view....
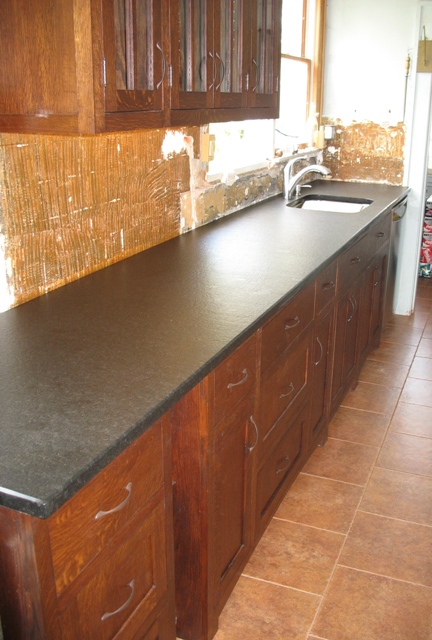
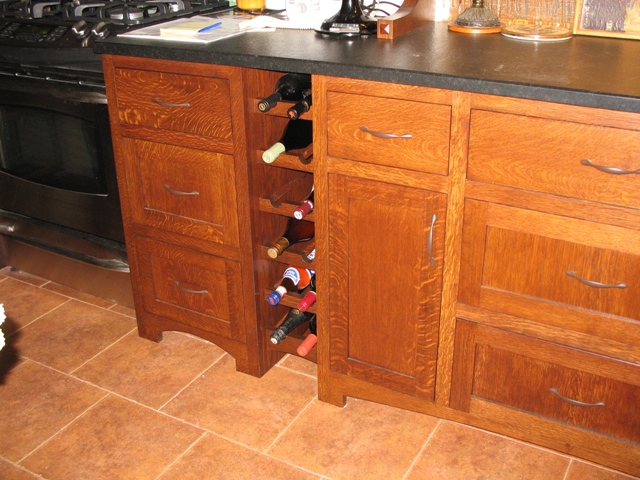
The small section of cabinet on the left end of both pictures above was originally going to be recessed about 6 inches due to the back wall indentation but we decided to bring the cabinet forward so the countertop would have a nice unbroken line and be more functional. The gap between the small cabinet and the others ended up being a perfect place for a small wine rack...
This is a view of the opposite side of the room with the doors and lights on. The backsplash space under the cabinets will be tiled as will the wall under the other large wall cabinet...
More updates coming soon, keep checking back!
Final Details, wrap up, and happy customer